Grilled Brie Cheese and Grape Quesadillas!

If your like me you've never really been the biggest fan of brie cheese. I mean I'm not a fussy eater and I actually like very unusual foods, but I just never really got the point of brie cheese. Then one day I was watching a cooking show and the chef was making a grilled cheese sandwich with brie cheese. It seemed that he was speaking directly to me as he started to explain that a lot of people don't really like brie cheese. He went on to say how brie was one of those cheeses that tasted better melted and complimented fruits very nicely. That is why brie is usually served at wine tastings. He went on to make several grilled brie sandwiches and the one that caught my eye was a "Grilled Brie and Grape Quesadilla". I just knew looking at it that it was gonna be great!
So here's my version of this delightful appetizer. This would be perfect to serve this Super Bowl Sunday, especially for the ladies who may be drinking wine instead of beer.


Next put some oil or non-stick spray in your frying pan and threw one tortilla in the pan. Then slice up some of the brie and place on the hot tortilla. While that is getting hot, you will cut in half approximately 10 grapes for each tortilla that you will be making. Once you have your grapes cut and the cheese has started to melt a little you can add your grapes. I usually only put the grapes on one side so that its easier to fold the tortilla.


You can now fold your tortilla and give it a gentle 'smush'. To me the key to good grilled food is all in the 'smush'. You want to press down firmly so that everything melts together and the tortilla becomes nice and flat, but don't press down to hard or all your grapes will escape from inside.

Once you have both sides nice and golden brown you can take the quesadilla out of the pan and start on your next one. I like to let them cool a little before you try to cut them or again the cheese and grapes might try to escape out the sides.

That's it. These are so simple and good. I warn you, these are so addictive. I like them so much the way they are that I never came up with a dipping sauce for them. If any of you guys have any suggestions for a good dipping sauce or tips to make these even better, I would love to hear your comments!


Thanks so much and Enjoy!!!

By Courtney, Aunt Tessie and the Boy.
Delightfully Deadly Bloody Fun Cupcakes.

These sweet treats are super simple to whip up. Here's Everything that you will need.

All you will need is your favorite cupcake mix, cupcake liners, fluffy white or vanilla frosting, red icing, and of course the Wilton sugar knives (these are pricey at $5.99 for the package of 12, but you can almost always print out a 50% off coupon for one of your local craft stores).

Next simply bake cupcakes according to the directions and heavily frost your cupcakes.

Then gather up your sugar knives!

Then with a pointed tip on your red icing put a blob in the middle and then add some squiggly lines. Once that is done, simply jab your sugar knife into the center.

Finally..enjoy your Bloody Cupcakes, if you dare!!!

Kid approved!!!
These festive and fun hot chocolate dippers and stirrers are perfect for gift giving this Holiday Season!

So EASY and inexpensive to make.
First you will need the following ingredients: Marshmallows, candy canes, sprinkles and chocolate for melting.

Next you will need to attach your marshmallows to your candy canes so that they are all ready to be dipped.

Then you will need to melt your chocolate.

Then simply dip your candy cane marshmallows into the melted chocolate.

Get your Kitchy Christmas sprinkles ready and sprinkle them on!

Let cool and you have the perfect hot chocolate stirrers!

Display in a cute vintage santa mug and add to your holiday buffet!

DEAR VALENTINE...
I mustache you a question...will you be my Valentine?
 |
Here's a quick and fun DIY Valentine treat. These are perfect if you are having a party or need an easy Valentine for your kids to handout at school.
First you'll need the Wilton Lollipop mold, which I picked up at Michael's craft store for $1.99. You will also need lollipop sticks, I like the 12 inch long ones so that you can have fun holding them up to your face and goofing around with them. For the pictures I also used red and white paper straws, which i just slipped over the lollipop sticks. Next you will need some chocolate to melt. I used white, dark chocolate,and pink. Finally you will need some string or twine to hang your FREE PRINTABLE mustache tags!


Click on the Picture below to print out your FREE printable Valentine tags!

HAPPY VALENTINES DAY!
Valentine you have my Heart!

Nothing says Valentine's Day more then the heart symbol. This year give someone special your heart by surprising them with a special twist in their Valentine treat. These are all such simple ways to show just how much you care!
Most of these treats require nothing more then a small heart shaped cookie cutter.
chicken soup with heart shaped carrots.

Pancake Recipe

chicken soup with heart shaped carrots.

Pancake Recipe
I'm still in the process of linking all pics to their original source. Check back in a few days and I will have all the links included. If you know the original link you can go ahead and add it to the comment section below, thanks.
HAPPY VALENTINE'S DAY!
XOXO

If your like me you've never really been the biggest fan of brie cheese. I mean I'm not a fussy eater and I actually like very unusual foods, but I just never really got the point of brie cheese. Then one day I was watching a cooking show and the chef was making a grilled cheese sandwich with brie cheese. It seemed that he was speaking directly to me as he started to explain that a lot of people don't really like brie cheese. He went on to say how brie was one of those cheeses that tasted better melted and complimented fruits very nicely. That is why brie is usually served at wine tastings. He went on to make several grilled brie sandwiches and the one that caught my eye was a "Grilled Brie and Grape Quesadilla". I just knew looking at it that it was gonna be great!
So here's my version of this delightful appetizer. This would be perfect to serve this Super Bowl Sunday, especially for the ladies who may be drinking wine instead of beer.

First gather your supplies. It couldn't be easier. All you need is a package of soft tortillas (any kind or size that you like) a bunch of grapes (again any kind you like, I always seem to like the green grapes the best) and of course some soft brie cheese. Brie cheese can be expensive, but you really only need a little bit for each.


Next put some oil or non-stick spray in your frying pan and threw one tortilla in the pan. Then slice up some of the brie and place on the hot tortilla. While that is getting hot, you will cut in half approximately 10 grapes for each tortilla that you will be making. Once you have your grapes cut and the cheese has started to melt a little you can add your grapes. I usually only put the grapes on one side so that its easier to fold the tortilla.


You can now fold your tortilla and give it a gentle 'smush'. To me the key to good grilled food is all in the 'smush'. You want to press down firmly so that everything melts together and the tortilla becomes nice and flat, but don't press down to hard or all your grapes will escape from inside.
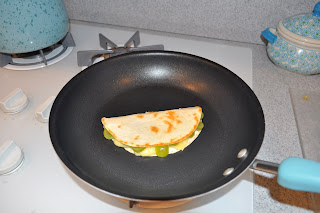
Once you have both sides nice and golden brown you can take the quesadilla out of the pan and start on your next one. I like to let them cool a little before you try to cut them or again the cheese and grapes might try to escape out the sides.

That's it. These are so simple and good. I warn you, these are so addictive. I like them so much the way they are that I never came up with a dipping sauce for them. If any of you guys have any suggestions for a good dipping sauce or tips to make these even better, I would love to hear your comments!


Homemade Heart Shaped Herb Croutons.


Grilled Brie Cheese and Grape Quesadillas!
If your like me you've never really been the biggest fan of brie cheese. I mean I'm not a fussy eater and I actually like very unusual foods, but I just never really got the point of brie cheese. Then one day I was watching a cooking show and the chef was making a grilled cheese sandwich with brie cheese. It seemed that he was speaking directly to me as he started to explain that a lot of people don't really like brie cheese. He went on to say how brie was one of those cheeses that tasted better melted and complimented fruits very nicely. That is why brie is usually served at wine tastings. He went on to make several grilled brie sandwiches and the one that caught my eye was a "Grilled Brie and Grape Quesadilla". I just knew looking at it that it was gonna be great!
So here's my version of this delightful appetizer. This would be perfect to serve this Super Bowl Sunday, especially for the ladies who may be drinking wine instead of beer.
Next put some oil or non-stick spray in your frying pan and threw one tortilla in the pan. Then slice up some of the brie and place on the hot tortilla. While that is getting hot, you will cut in half approximately 10 grapes for each tortilla that you will be making. Once you have your grapes cut and the cheese has started to melt a little you can add your grapes. I usually only put the grapes on one side so that its easier to fold the tortilla.
You can now fold your tortilla and give it a gentle 'smush'. To me the key to good grilled food is all in the 'smush'. You want to press down firmly so that everything melts together and the tortilla becomes nice and flat, but don't press down to hard or all your grapes will escape from inside.
Once you have both sides nice and golden brown you can take the quesadilla out of the pan and start on your next one. I like to let them cool a little before you try to cut them or again the cheese and grapes might try to escape out the sides.
That's it. These are so simple and good. I warn you, these are so addictive. I like them so much the way they are that I never came up with a dipping sauce for them. If any of you guys have any suggestions for a good dipping sauce or tips to make these even better, I would love to hear your comments!
Thanks so much and Enjoy!!!
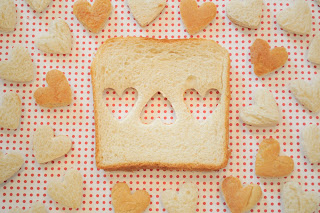
Homemade Heart Shaped Herb Croutons.

Simply take your bread and cut away with your heart shaped cookie cutter.

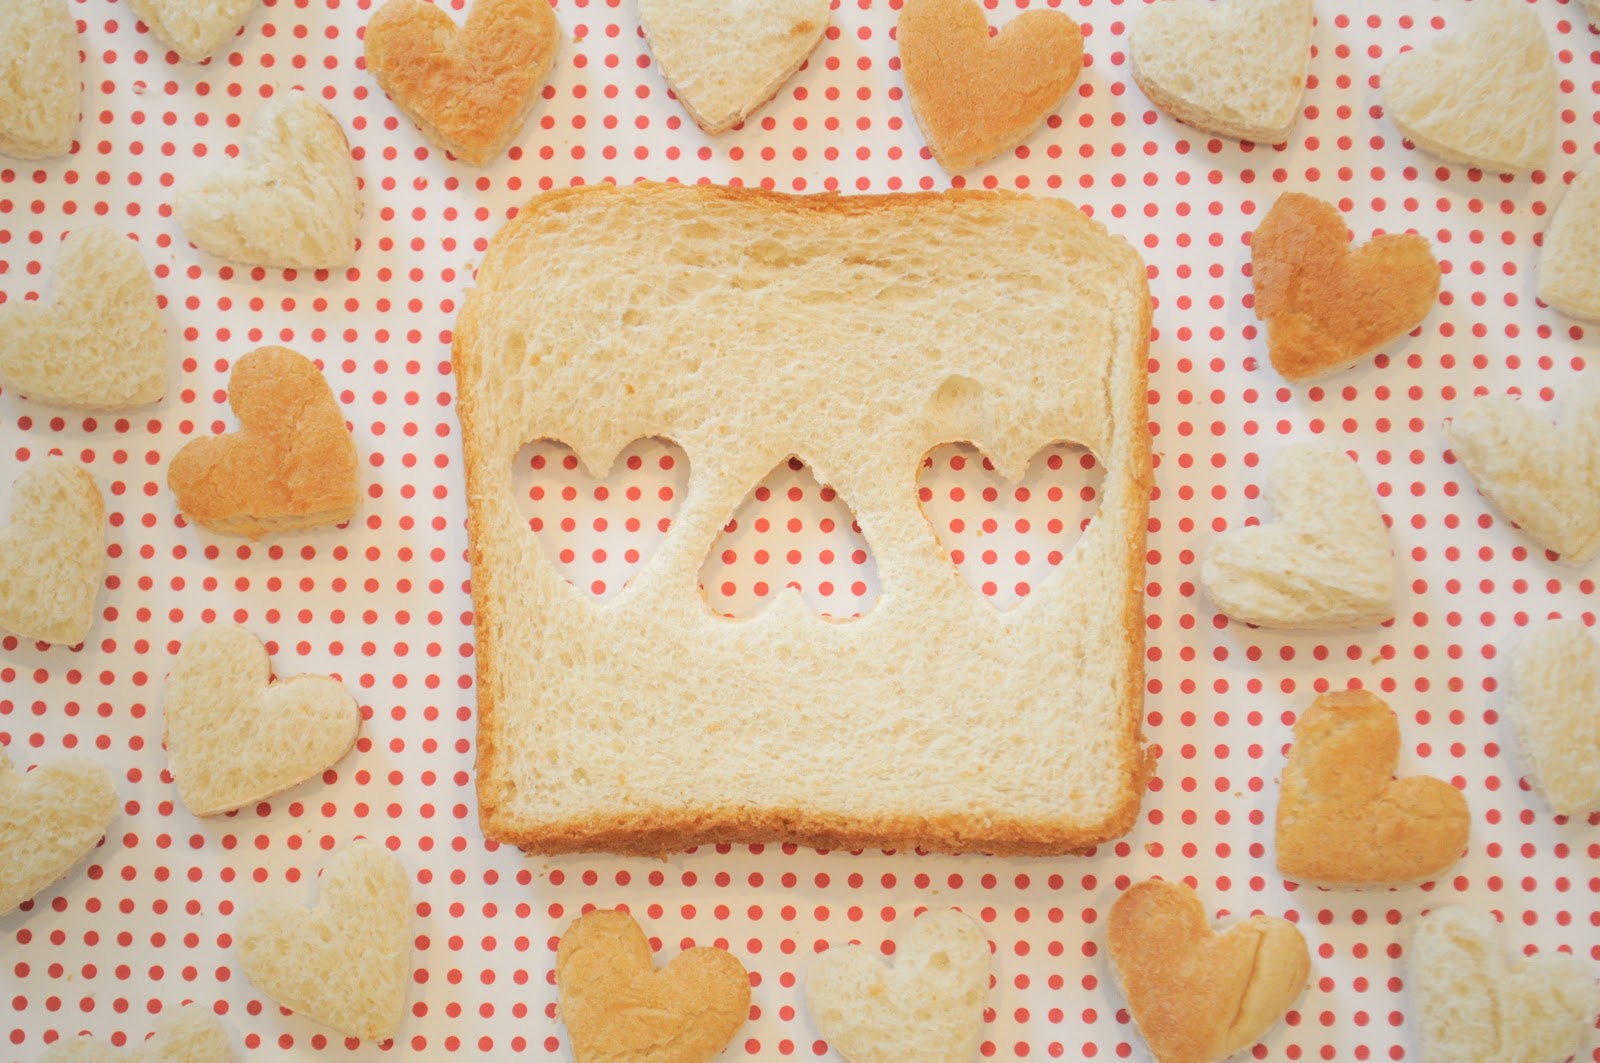
Next sprinkle some oil and season with herbs, salt and pepper.

Toss and bake at 350 degrees for 15 minutes.
Watch carefully towards the end as they can go from being done to burnt very quickly!

Enjoy in your salads or with a delicious bowl of split pea soup. Click HERE for the yummiest Split Pea Soup quick and easy recipe!
ENJOY!!!


No comments:
Post a Comment
Please be a dear and leave a comment!